Skip to content

Upload your expenses with Receipt Capture
No more missing receipts or piles of paperwork. Snap receipts and bills with our easy-to-use app and QuickBooks extracts the relevant data for you. It can even match them to your transactions – automatically
Step 1 – Upload receipts and bills into QuickBooks
Upload receipts and bills into QuickBooks
There are 3 ways to get your receipts and bills into QuickBooks:
- Snap them using the QuickBooks mobile app.
- Drag and drop an electronic copy.
- Forward by email.
How to snap a receipt
Open the QuickBooks mobile app and select the Menu ≡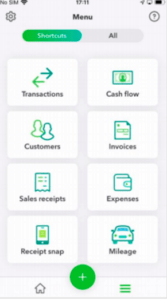
- Select Receipt snap
- Select the Receipt Camera and snap a photo of your receipt (Line up your receipt or bill in the green box)
- Choose Use this photo, then Done
It will take up to 15 minutes for QuickBooks to extract the information from your image.
You can view receipts you’ve already approved and those in process by selecting Menu ≡ and then Receipt Snap.
To add a receipt to your books, sign in to QuickBooks online. The details from your snapped receipts will appear in the Receipts tab.
How to drag and drop receipts
- Sign in to QuickBooks Online.
- From the left menu, select Banking
- Go to the Receipts tab.
- Drag and drop the receipt or bill file directly into QuickBooks Online or select Browse to upload them. Each image or file should only contain a single receipt or bill.
- You can upload the files as a PDF, JPEG or PNG
How to forward receipts by email
- Sign in to QuickBooks Online.
- Select Register your email to get started. (If you see ‘Send receipts to [email protected]’ you’re already registered).
- Attach receipts and bills to an email or forward electronic receipts for online purchases or services (Uber etc). These files can be in pdf, jpeg, jpg, gif or png format.
- Email your receipts and bills to [email protected].
- QuickBooks will extract the supplier, date, total and last four digits of the credit card number. You’ll see the receipt in the For Review tab in Receipts.
You can send multiple receipts and bills in one email to a maximum of 20 MB. Each image or file should contain only one receipt.
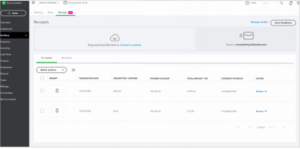
Step 2 – Review, edit or match receipts and bills
Upload receipts and bills into QuickBooks Once your receipts and bills are added into QuickBooks, they’ll appear in the For Review tab in QuickBooks Online where you can also edit and match transactions.
- Sign in to QuickBooks Online.
- From the left menu, select Banking
- Go to the Receipts tab.
- For a side-by-side view of the receipt and the data extracted, select the row.
- Select Review to edit the extracted information. If there are multiple matches, select Review to choose the match you want.
If you’re not sure how to categorise your receipts or bills, speak to us. You may need to create a new supplier for bills if one hasn’t been created previously