Skip to content

![]() How to send estimates and invoices with the QuickBooks mobile app
How to send estimates and invoices with the QuickBooks mobile app
There’s an easier way to get paid. Speed up your invoicing and improve your cash flow with QuickBooks invoicing. You can send invoices and estimates on the go, get paid with a touch of a button and set automatic payment reminders in the QuickBooks app.
Here’s how to get started.
Create a customer
 In the app, select Menu ≡ then Customers.
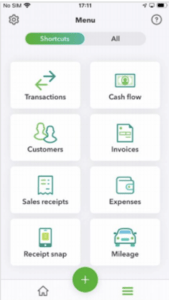
- Select (+) in the bottom right of the screen to create a new customer
- Enter the recipient’s email address, phone and address (optional). You can also import from your contacts using the icon in the top right hand corner.
- Save your entry.
- In the app, select Menu ≡
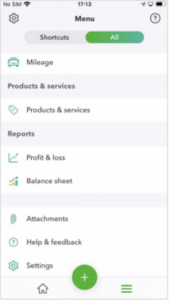
- Open All at the top of the page
- Scroll down to Products & services
- Select (+) in the bottom right of the screen to create a new product or service
- Enter the name, unit price (tax code if inclusive of tax), the account and category if you have set them up online (optional)
- The description is what the customer will see when you send an invoice or sales receipt.
- Enter the sale price/rate or leave blank if it changes from sale to sale.
- The income account is the category QuickBooks uses to categorise the income when you enter a sales transaction.
- Save the record.
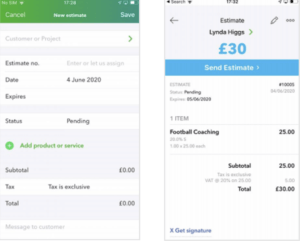
- In the app, select (+) then Estimate

- Choose Customer or Project at the top of the form
- Select an existing customer or (+) in the bottom-right corner to create a new customer.
- To change or remove a customer, tap on the customer name.
- Either enter an Estimate Number or the next sequential number will automatically be added
- Enter the date, expiry and estimate of the status.
Create a product or service
- Select Add Product or Service to select an existing product or service or (+) to create a new one.
- Select Add in the top right-hand corner.
- Add a customer message (optional) if sending via email.
- Save in the top right-hand corner
- Review or delete the estimate by selecting the 3 dots in the top right-hand corner.
- Send Estimate to your client via email.
How to create an invoice (from estimates)
If you have already created an estimate: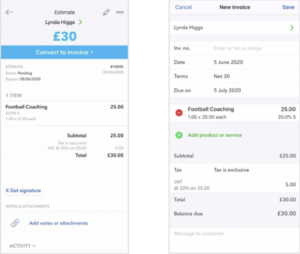
- Select Menu.
- Select All at the top.
- Scroll down to Estimates.
- Open the relevant estimate and Convert to Invoice.
- Enter an Invoice Number or the next sequential number will automatically be added.

- Confirm your payment terms and details.
- Save in the top right-hand corner.
- Review or delete your invoice by clicking on the 3 dots in the top right-hand corner.
- Send Invoice to send the invoice to your client via email (optional).
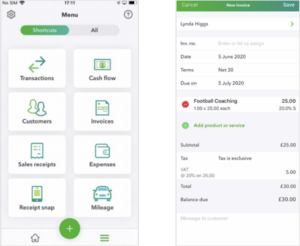 Choose Invoice
- Select Customer or Project at the top
- Select an existing customer or tap (+) to create a new customer
- To change or remove a customer, tap on the customer name
- Enter an Invoice Number or the next sequential number will automatically be added.
- Choose the date and terms of the invoice

How to create an invoice (from scratch)
- Select Product or Service to add an existing product or service or tap (+) to create a new one
- Select Add in the top right-hand corner.
- Add a customer message (optional) if sending via email.
- Save in the top right-hand corner.
- Review or delete the invoice by selecting the 3 dots in the top right-hand corner
- Send Invoice to your client via email (if status is NOT accepted).
Receiving a payment
- Open the app and select (+)
- Choose Add Invoice Payment
- Select an existing customer or (+) in the bottom-right corner to create a new customer.
- To change or remove a customer, tap on the customer name.
- Select the date, payment method, reference number (optional) and where the money is being deposited/has been deposited.
- Select the relevant invoice to reconcile this payment against it.
- Save